

There can be so many questions that arise when considering custom printing on LEGO.
From “how do I make my artwork?” through to “Is it possible to print clear?”…
The truth is, every project heading for print needs to be handled as it’s own unique thing… and as such… the unique questions that arise for the desired outcome can be worked through in a methodical manner.
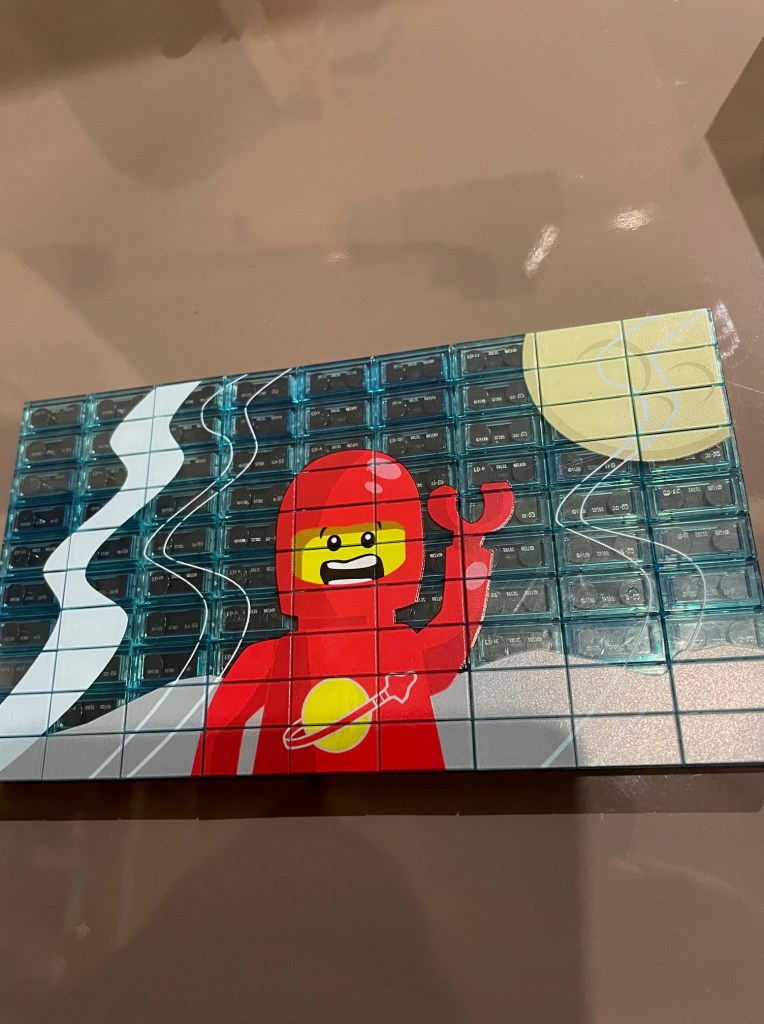
One such project was one that required the need to print onto a series of “transparent light blue” tiles that were mounted on a large black plate.
The idea behind the brief was that the “panel” was intended to look like a large monitor, containing a classic space minifig who was being filmed on a planet.
From this brief, the artwork needed to be considered carefully.
“And just why is that?” I hear you ask…
Well… when printing using UV technology, there are many variables that can come into play, and without careful consideration, things could get rather “washed away”.
Many printers have many colour configurations and particular configurations can be used for various outcomes. When I was considering the best machine for printing on LEGO, I considered many things… and the colour configuration was indeed up there as a priority… and the need for what is technically known as a “white channel” was critical!
A white channel… is as the name implies… simply the ability to print white!
And with this potential of printing white… comes further considerations around software, output, quality and of cause… artwork.
You see, although the ability to print white may not seem like anything new… what is important is the control over that white!
Yes… that’s right… when printing using the UV method, there is the potential to control colours… and more so… the white channel!
But what do I mean by control?
well… imagine if there was a need to print a “frosted” look on a window… or perhaps a solid, sharp, fine spiderweb…these simple two scenarios will require completely different use of the white printing capacity!
And just how does this control come from?
Simple really… its a combination of 3 main things… the printer being used, the software driving the printer, and the artwork being printed.
Anyway… back to the giant space monitor in question!
When designing the artwork, it was understood that the colours had to really “pop”… yet the transparency of the actual bricks where there was no print needed to show their colour effect to aid to the look of a giant space TV.
With this in mind… the decision was made to add a “white layer” to the artwork. meaning that it could be used to define the regions requiring a white underlay.
Once the white underlay was assigned in the artwork… the next choice was around the “density” required for printed white layer.
The decision was made to make the white layer a nice, solid white. This would mean that any printed colour on top of it would be bold and vibrant.
And what a great outcome I must say…
You can see in the close up below the depth of colour with control over the white, preventing it from “bleeding out” from under the colour print.
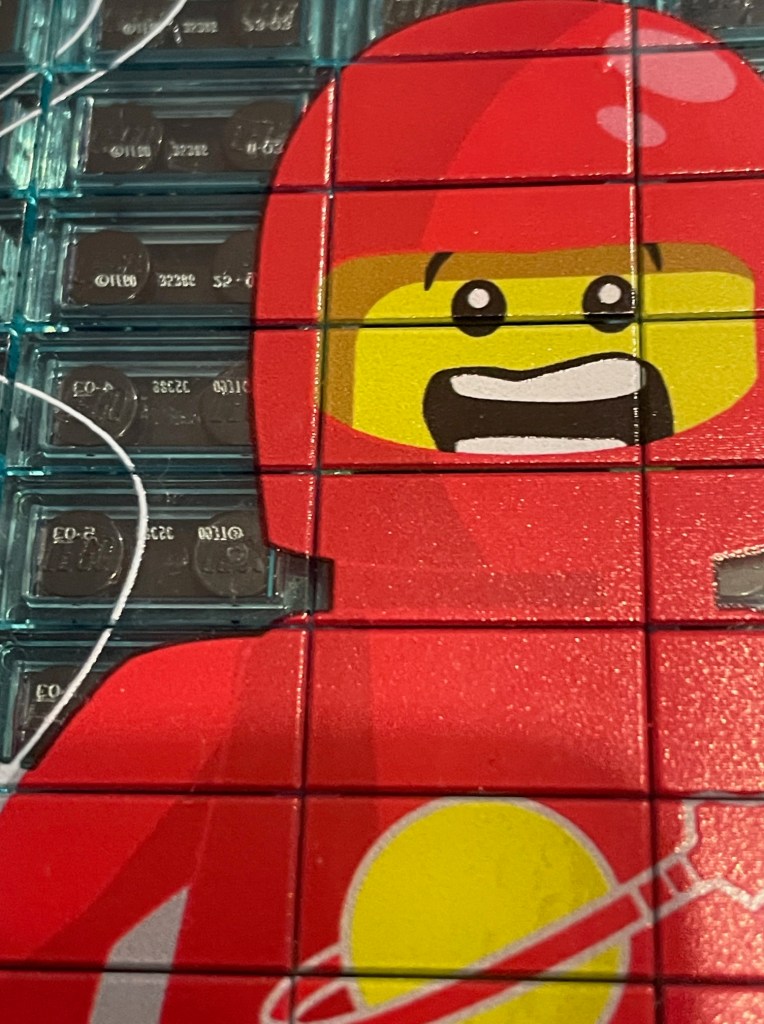
This was a great project to work on, and I believe is a great example of the potential of printing on LEGO using the UV technology. Without the white underlay, the colours would be washed out and effected by the blue in the transparent tiles… creating a totally different outcome.
Do you need some custom printing for your next MOC?
Are you unsure of the potential of UV printing for LEGO graphics and customisation?
Have further questions around Custom Brick printing or Wez’s World series releases?
Wez’s World is NOT affiliated with nor does not claim to be trading as part of LEGO Group.
LEGO is a registered trademark of the LEGO Group
