

Whilst I am indeed a LEGO nerd… I am also a huge fan of rockets! I mean… it doesn’t take a genius to work that out given the up coming release of the “Real Space” series!!!
For over a year now, I have been working on quite a huge LEGO build. It is a replica of one of the worlds most successful rockets! Flown at Australia’s own “Woomera” launch site hundreds of times, the rocket known as the “SKYLARK” is little known by most. But trust me… this rocket has a rich history, a series of cool upgrades and… well… to be honest… it just looks damn awesome!
If you would like to get the full history of the SKYLARK, check out the Skylark (rocket) wikipedia page.
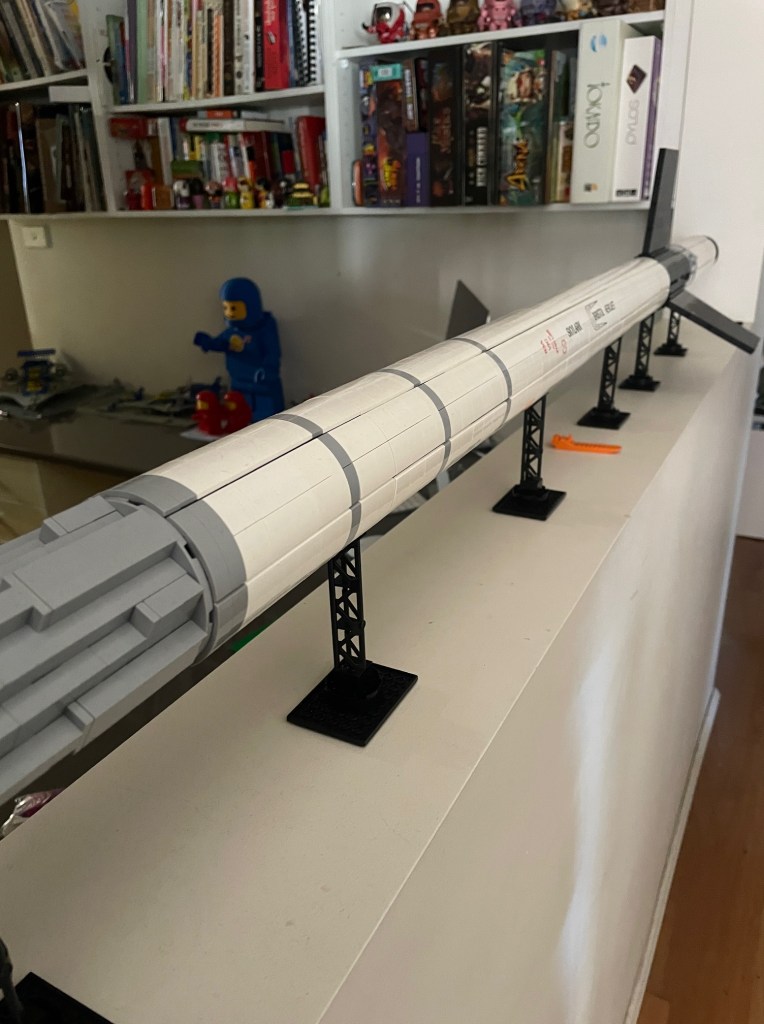
The LEGO build was a carefully planned and focussed project over a long time…heres some shots taken mid build…
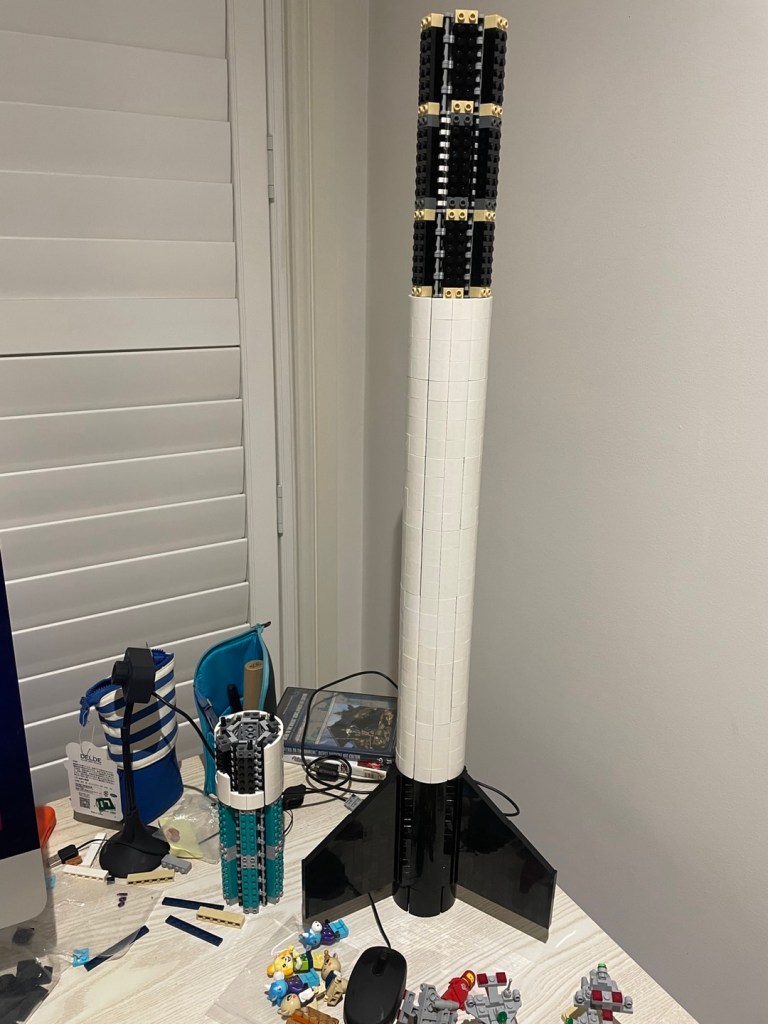


The build went through many changes. One of the most significant was changing the top section of the airframe (just under the nosecone) to an alternate version of the Skylark… yes… there were many versions of the Skylark featuring alternate colours, booster stages and fin configurations. The image above shows a “dark orange” section under the nosecone… I changed this out to a white version as I believe it showed more of a raw and nostalgic rocket.
Finally, the build was complete… and the LEGO replica of the Skylark stands around 1.5 meters tall! However, I have mounted this beast of a rocket build horizontally as I believe it shows off the details way better this way.
SO… what do you do with a giant white LEGO rocket?
Well… if you are one for details… and have the ability to print on LEGO using a commercial grade UV printer (like the one at Wez’s World hehehe) you get designing!
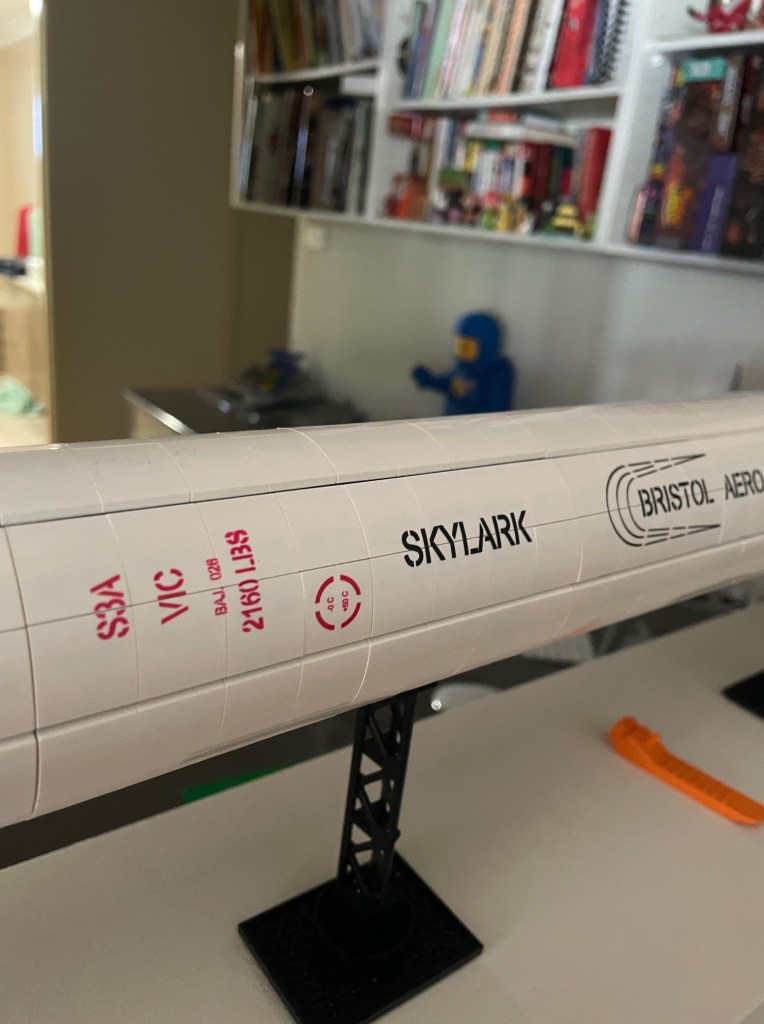
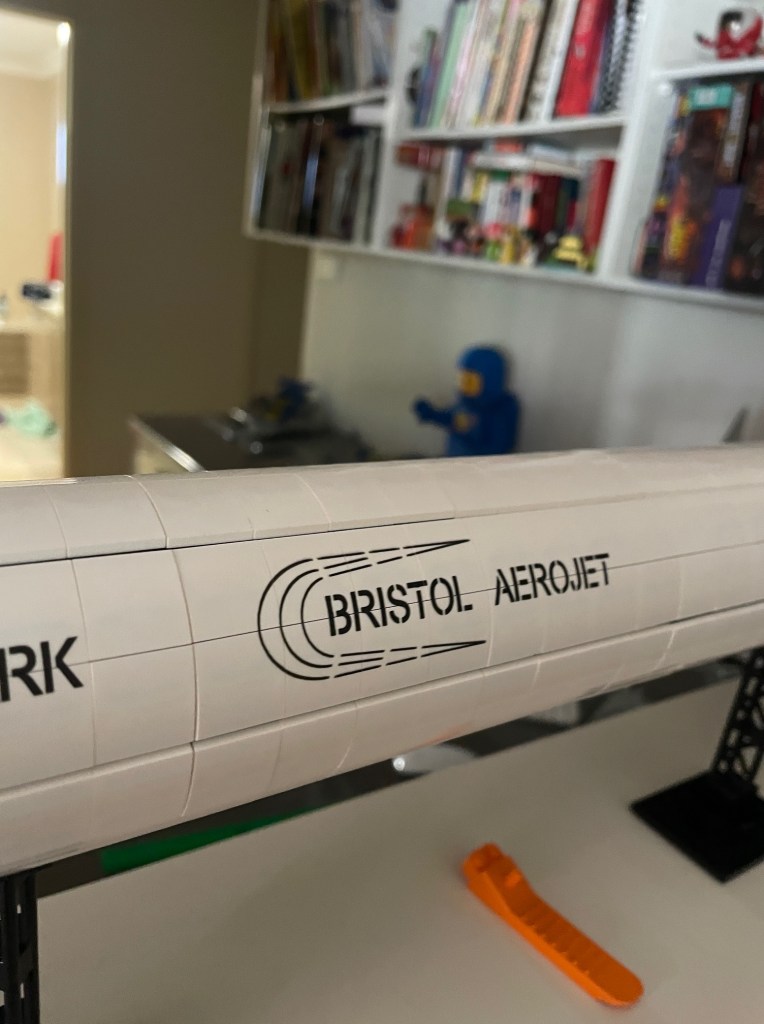
Yes… that’s right… The Skylark had various markings over its many launches. So the first thing to do for me… was to find the most appropriate markings for the build created… And it wasn’t long before I found what I was looking for!
Check out the markings found on the Skylark Rocket at the PowerHouse Museum collection HERE
It was onto Illustrator, where I carefully recreated the designs and markings. And after some time, I had something that I believe did justice to the original.

Those with a keen eye may notice one marking is missing from the artwork… a circle with specific temperatures listed. This was deliberate… you see… when planning to print on curved surfaces using UV methods, it can be tricky… in fact… some may say that it is impossible! Whilst there are limitations to UV printing, and some curves are beyond the capacity of any UV machine… it is actually possible to print on curves. The secret… it is all in the planning and artwork! Oh, and it also helps to have years of practical, professional working experience within the print industry! Knowing these machines and their capacity is critical when talking printing on your favourite bricks! I am also one who’s known for pushing the boundaries on what can be done… experimenting and learning that fine line between crazy and ridiculous!
Anyway… The markings were indeed added, but due to their positioning, I knew I needed to create and print this one part of the design separate…

So… with the artwork in position and the “Prepress” checks done, it was time to print!
Using custom jigs specifically to ensure positioning of LEGO parts, the print was soon complete… and the SKYLARK received its long awaited final touch!

As you can see… with a little planning, the right approach to artwork, prepress and a technical understanding of the UV print process, the potential is only limited by imagination!
Do you need some custom printing for your next MOC?
Are you unsure of the potential of UV printing for LEGO graphics and customisation?
Have further questions around Custom Brick printing or Wez’s World series releases?
Wez’s World is NOT affiliated with nor does not claim to be trading as part of LEGO Group.
LEGO is a registered trademark of the LEGO Group
